Showing posts with label conferences. Show all posts

5 Benefits To Using Standards Checklists In The Classroom

stay on track using standards checklists

Do you find it difficult and frustrating to track all the Common Core ELA and math standards you are required to teach each year? With only a 180 days to get everything taught, it can be overwhelming and easy to miss some standards that are important to student growth. I want to share some important reasons you should be using standards checklists and the benefits they lend to you as a teacher.

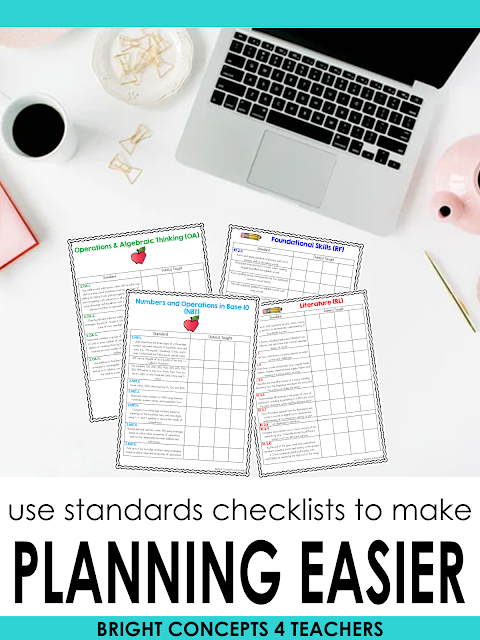
Standards Checklists Make Planning Easier
Common Core standards checklists

Incorporating checklists into your planning process can significantly simplify your workload. As you progress through teaching the standards and check off each item on the list, you will have a clear idea of what is left to cover. When planning your initial instruction, focus on the first column of the checklist. Once you have successfully completed the first column, you will be well-prepared to provide additional instruction on standards that require further reinforcement. Whether you choose to follow a sequential order based on your pacing guide or deviate from it, the checklist will serve as a valuable reference to identify the skills you need to include in your upcoming lesson plans. This allows you to  effortlessly ensure that all core content is incorporated into your teaching process.


Standards Checklists Help Keep You On Track
common core standards checklists benefits

Keeping a checklist of ELA and math standards offers a clear and organized roadmap for instructional planning. By having a comprehensive overview of the specific standards students need to master, you can create targeted lesson plans and activities that align with these objectives. The checklist ensures that every essential ELA and math skill is covered, leaving no gaps in instruction. In other words, it holds you accountable! This level of organization provides both you and your students with a clear focus and targeted and purposeful learning.


Checklists Help to Track Mastery of Standards

Assessment is a vital component of effective teaching, allowing us to gauge student progress and identify areas of improvement. A Common Core Standards checklist provides a clear framework for designing assessments that align with the standards. You can create targeted assessments, both formative and summative, to evaluate student understanding of specific ELA and Math skills. These checklists also enable ongoing progress monitoring, as you can mark off mastered standards and focus on addressing any remaining gaps.

Checklists Help Plan For Individualized Instruction

Every student has unique strengths and areas for growth, making differentiated instruction crucial in the classroom. Using ELA  and math standards checklists enables you to identify individual learning gaps and tailor your instruction accordingly. By understanding the specific skills and knowledge required at each grade level, you can provide targeted interventions, extensions, and enrichment opportunities. The checklist serves as a valuable guide, helping you differentiate your instruction to meet the diverse needs of your students effectively.

Standards Checklists Contribute To Collaboration

Maintaining standards checklists promotes effective collaboration and communication with parents and colleagues. Sharing the checklists with parents fosters transparency and provides a common understanding of the expected grade level standards. This collaboration creates a supportive home-to-school connection, enabling parents to reinforce their child's learning at home. Additionally, sharing the checklists with colleagues promotes professional dialogue, allowing teachers to collaborate and share best practices for implementing Common Core standards effectively.


Suggested Resources 
If you would like to get a set of ready-made grade level standards for ELA and math just grab your set by clicking your grade level below:

common core standards checklistscommon core standards checklists


common core standards checklistsCommon Core standards checklists


Common Core standards checklistsCommon Core standards checklist

Grade level common core standards checklists

{DON'T FORGET IT! PIN IT!}

Common core standards checklists


Managing Student Learning Goals

As educators, our job is to help our students reach their highest potential. However, not all students are created equal. They all have different needs. Some need to grow academically more than others. Some students need to grow their personal independence. Some just need to get through a period of time on task. And many of MY little sweeties need to learn to tie their shoes on their own!

WHAT'S A TEACHER TO DO?

As educators, we need to help our students work towards achieving goals that are meaningful to THEM! 

How do we tackle this task?

FREE student goal cards

I have always struggled with helping my students set and follow through with individual learning goals. I would usually start off strong and then as the year progressed, it would fizzle out. I would forget to follow through with them and before I knew it the next reporting period had come and gone. 

UNTIL NOW.... I saw this great idea, first, on Instagram from @misswestbest. She has her student goals on their name plates. I LOVED the idea but wanted to change it a bit to meet the needs of my second graders. My students have their names on their supply boxes already. I wanted their goal cards to stay at their desks and be a constant reminder for them.

learning goal cards

I know what you are thinking....This is all great, BUT how do I get my students to buy into this? 

1.  GOALS NEED TO BE REALISTIC 

Before we wrote our first goals, we had a class discussion about what a realistic goal would be. Many students wanted to write: "I will get 4s on all my tests." While that is a great goal, it's not realistic. We discussed picking a specific test they wanted to do well on. This narrows their focus and gives them something specific to work towards.

free student learning goal cards

2. GOALS NEED TO BE MEASURABLE

I had to guide and help my students understand this concept. I had students who wanted to write, "I want to do well on my math test." What is "do well?" This little guy wanted to get all his IXL math problems correct. While this is a great goal, I wanted him to feel successful. We talked and decided 85% accuracy was a realistic goal he could achieve. AND...it's measurable.

student goal cards

3. GOALS NEED TO BE CELEBRATED

When my students reach one of their goals, they earn a brag tag to celebrate their accomplishment. They hand me their Post-It note with their goal and the date they met the goal. I put the Post-It on a sheet of paper in their portfolio folder. Everyone claps and cheers for the student! It's an amazing site! Students beaming with pride!

student learning goal cards

Note: After a few weeks of setting and achieving goals, my students were able to manage their goals themselves. They write their goal on their individual white board and put it on top of their desk. This let's me know they need their goal checked by me. If the goal is appropriate, I hand them a Post-It and they write their goal on it and place it on their goal card. I usually adjust or guide my students into a goal that I want them to focus on improving without them realizing it.

There is no pressure to achieve a goal by a certain date. However, if I see a student hasn't met a goal in a few weeks, I ask them to rewrite it or make it more realistic and measurable. I want them all to feel success within a reasonable amount of time.

Ready to get started? Grab your FREE set of learning goal cards by clicking: HERE.
*Please note: You must have PowerPoint to open and use this file.

I love to hear from my readers. Leave a comment and share how you help your students manage and set their learning goals too.

{DON'T FORGET IT! PIN IT!}


Back To School Ideas

Back to school classroom ideas

Back To School is in full force! And we all know, there is no tired, like teacher tired during the first month of school. I am going to share a few time saving tips with you that will help ease your stress levels and help you relax a bit during the beginning of the school year.

I love to create a sense of classroom community starting with the first day of school. I always take a first day of school picture of my students to send home to families right away. Creating memories and making the first few weeks of school unforgettable for students is crucial to fostering those new relationships. These photo booth props are also a fun activity for students and their families for: 
Meet the Teacher
Back To School Night 
Open House 
and the First Day Of School! 

Back To School Ideas for the elementary classroom

Are you required to post student learning standards each day? I was spending WAY TOO MUCH time writing the CCSS out on the board each day. It took up valuable learning space on my board and I was getting frustrated. To solve this problem, I created kid-friendly standards posters I could change out easily and quickly in a pocket chart. The front of each card has the standard, in kid-friendly words. The back of each card, has the actual standard written out with the standard number and strand. These are available for all the ELA and MATH standards grades K-5. Now, when I have my admin, a parent, etc. come into our classroom, they can easily see what skills we are working on throughout the day.

Easy to use student friendly standards cards in kid friendly language make switching standards out so much easier.


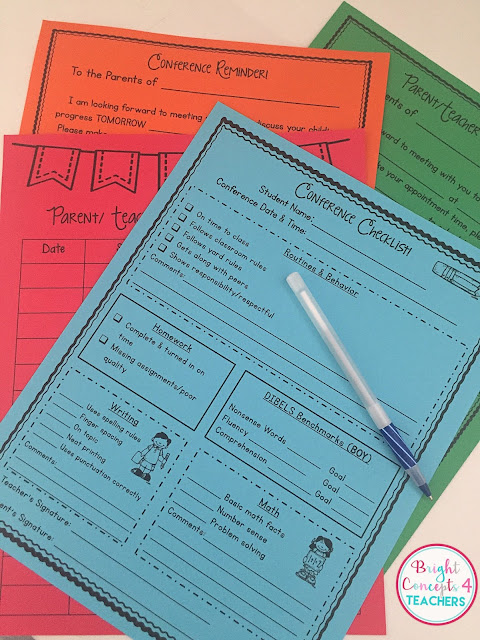
Do parent conferences stress you out? Do you hate prepping for them or don't know how to organize all the information you want to tell them in 15 minutes? I have the resource for you! Getting organized for conferences has never been easier, since I started using this personalized conference binder. It has all the forms and information I need at my fingertips. 

Conference Forms

All the forms are editable, which helps save time too! This pack includes:

1. A conference note to send home with the date and time of the meeting. 
2. A reminder note
3. Sign in sheet
4. Missed You At Our Conference note
5. FIVE conference checklist options
6. Personalized binder cover


I love to use these editable parent teacher conference forms to help make conference run smoothly.


This is, by far, a new favorite in my classroom! Be the coolest teacher on campus with this Back To School bulletin board. Bridging the gap between school and social media will make you a hit with your students and their families. Each student will create their own Instagram page with a personalized picture, comment, and hashtag. This is a great student center bulletin board that you can leave up all year! I emailed the parents and asked them to email a picture of their child doing a favorite activity, on a summer trip, or just hanging out. They kids were so excited to see their faces up on the board as each picture was sent in. It is a great motivator and they love reading what each caption says.

Instaclass back to school bulletin board


Do you get frustrated always having to stop your teaching to help a student log on to a website? Are you looking for a way to organize their user names and passwords? I have the resource for you! And the best part....it's FREE!

I was getting so frustrated every time we went to computer lab and I would always have several little kiddos tell me they couldn't log on to a site because their password didn't work. Nobody has time for that!  To solve this problem, I created individual student password cards! This was a game changer for me. Just write the student's name, user name, and password on the card. Then, laminate them and hole punch so you can put them on a ring. Each time I go to the computer lab, I grab the appropriate password ring and off we go. Ta Dah! Problem solved! Grab your freebie below:

Back To School Ideas


I hope these back to school tips have given you some ideas that you can use in your classroom. Best of all, you can start implementing them immediately! Enjoy!

{DON'T FORGET IT! PIN IT!}


Interactive Notebooks Tips & Tricks: Part 4

Welcome to Part 4 of my Interactive Notebooks Tips and Tricks blog series. This week I am discussing everything about rubrics and grading.

I have to admit, when I first started using interactive notebooks I didn't use a rubric. I modeled how the pages should be completed and explained my expectations, but there was no visual reference for the students to refer to besides my model page. Most of my classes were OK with that. However, this last year was a bit different. My students needed the rubric to be successful. 


I created this kid-friendly rubric for each of them to glue into the inside of the front cover of their notebook. I also post a copy of it on our math concept board for easy reference!


If you would like a copy of the rubric to use, you can grab it by clicking on the picture below. This FREEBIE also comes with sample math interactive notebook pages for you to use as well. 


Grading... this can be tricky and time consuming if you are using interactive notebooks during whole class time. Collecting and grading 24+ notebooks is just one more thing you do NOT need on your plate. If you are using interactive notebooks during small group time, it is a bit more manageable to grade. 

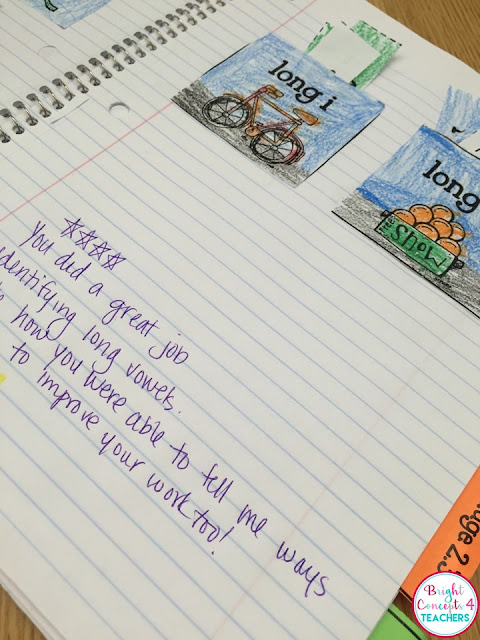
To solve this great dilemma in my classroom, I switch between whole group and small group time when using INB. This way I can focus on grading a small number of  student notebooks at a time. I use the rubric and then add constructive and meaningful comments. This allows the students to know what they are doing well, and how they can improve their work too.

Using a rubric and grading interactive notebooks looks different in every classroom. Check out these grading tips to help you get started.


But....let's be honest.... grading and commenting on all these notebook pages is difficult to keep up with. It is SO easy to fall behind and then you just throw your hands up in the air and give up trying to grade them. 

In order to tackle this problem, I would have my students "grade" themselves on all their pages they completed. Once a week, I would have them choose one page they wanted me to look at and comment on. Of course, I looked at all the pages, but I only commented on the one page they chose. This kept the kids honest about their work quality and grading. They knew I was going to look at it at some point!

Using a rubric and grading interactive notebooks looks different in every classroom. Check out these grading tips to help you get started.

Using a rubric and grading interactive notebooks looks different in every classroom. Check out these grading tips to help you get started.

I hope this blog series about Interactive Notebooks: Tips and Tricks gave you some new ideas and inspiration to get started using them with your students or at least a new idea to implement if you are already using them. Remember that it is an ever evolving process. Each class is different. Find what you love and make it work for you and your students! 


{DON'T FORGET IT: PIN IT}

Did you miss any part of this blog series? No worries. Just click on the links below to the posts you missed and get started!


Interactive Notebooks Tips & Tricks: Part 3

Welcome to part three of my interactive notebook series! In this post, I am going to be discussing different ways to manage your notebooks in the classroom. If you missed the first two posts about why to use interactive notebooks and how to set them up, the links are at the end of this post.

Great ideas to help you manage your interactive notebooks.

At this point, you have committed to using interactive notebooks or at least giving them a try because you know all the awesome learning benefits of your students creating them. You also have some ideas on what you need to do to set up your notebooks, before you even put them into the hands of your little learners. Today, I want to help you conquer HOW TO MANAGE these bad boys. This can be tricky, so you may need to try a few different ideas before you get it "just right".


There are so many different ways to store your student notebooks. It really depends on your classroom set up. In my classroom, I have a table/desk for every 2 students with a place for them to keep their supplies and books. This picture will give you an idea of how I set up my desks. 

Great ideas to help you manage your interactive notebooks.

Each of my students has their own supply box with materials they will need throughout the school day. In this box they have crayons, pencils, erasers, a glue stick, dry erase marker, and correcting pens. I HATE, dislike greatly, the idea of communal supplies. As a kid, and even as an adult, I like my things "just so". I take care of my things. Not everybody has the same standards of taking care of their supplies. For this reason, I always have my students keep their own supplies in their desks. This is what their boxes look like. 

Great ideas to help you manage your interactive notebooks.

Why am I telling you all of this? What does it have to do with interactive notebook storage?  

The point is, my students always have the supplies they need to complete their notebook pages with them. I don't have to waste time passing out supplies. The only thing they have to get is scissors. I will not let them keep these in their desks. When we work in our notebooks, I dismiss the kids by table to get a pair of scissors to use. SIMPLE. EASY. TAKES 2 SECONDS.

All my students keep their interactive notebooks INSIDE their own desk! Yes, I know this is unheard of in many classrooms. I have NEVER had a problem with the notebooks being destroyed or damaged. In second grade, we have one textbook for reading. All of our other resources are consumable. The materials they need are stored in folders in their desks. The point is, they don't have a lot to keep in their desks, therefore their notebooks survive. 

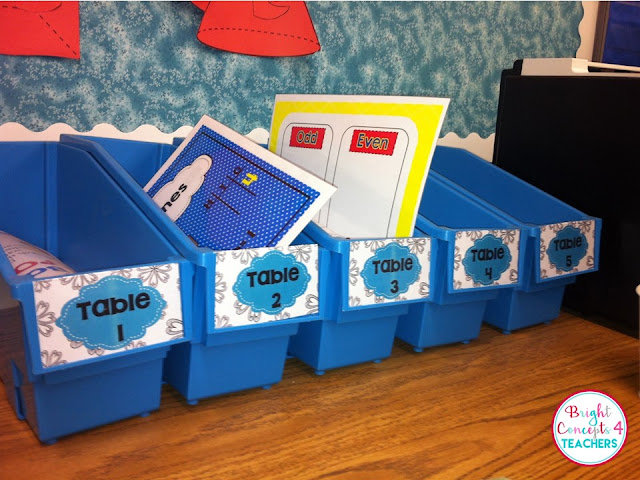
Many teachers use bins or trays, such as these, to store their notebooks in also.

Great ideas to help you manage your interactive notebooks.


I suggest experimenting and seeing what works best for you. Don't give up!


Oh the dreaded "little pieces!" I solved this problem pretty easily by gluing an envelope to the back cover of the notebook. Tape does not work. It peels off too easily. A little white glue and you are all set. I suggest doing this when you are setting up your notebooks BEFORE they are in the students possession. 

Great ideas to help you manage your interactive notebooks.


There will ALWAYS be those students that don't finish in the allotted time frame. My students finish their notebooks during morning warm up the next day. Sometimes, I allow them to take it home as part of their homework. It really depends on the child and if I feel they are responsible enough to bring it back the next day. If we are doing center work, I integrate the notebooks at that time. Students need to finish any incomplete pages first, before starting a new one. These 3 options usually get the job done! 

I hope you were able to take away a few management tips and tricks. I hope you stop by next week for part four: Grading and Rubrics.

{DON'T FORGET IT: PIN IT}

If you missed any of the posts in this series, be sure to check them out by clicking on the links below.