Directed Drawings: More Than Just Art

Directed drawings....have you tried it? In my opinion, it's a MUST in every classroom! I have witnessed so many of my quiet, introverted, students who never raise their hand for anything, flourish during our directed drawing lessons. Let me tell you why directed drawing are so much more than just an art project.
 Improve Listening Skills
During a directed drawing lesson, students are forced to listen and watch each step of the drawing process. This skill can be very tough for many students to master. I breakdown each step so that the entire process is manageable for all the students. I model the first step in front of the whole class. Then, it is the students' turn to try it. I walk around the room and monitor their progress, make adjustments where needed, then I introduce the next step. I try to encourage my students to limit their erasing. Their picture needs to be unique just like they are. It does not need to be a carbon copy of my sample. 


Connect To Other Learning
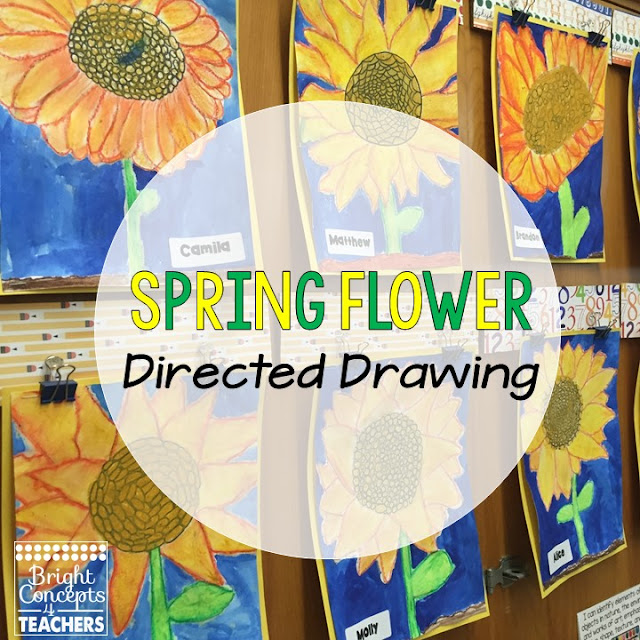
I always connect our drawing lessons to something we are studying and learning in language arts, science, or social studies. Currently, we are studying the life cycle of plants. This directed drawing lesson was a great connection to that learning. We used our new vocabulary words to describe the parts we were drawing. We discussed how each part functions and its importance. 

Improved Self Esteem
So many students struggle to meet academic benchmarks on a daily basis.  Our directed drawing lessons always seem to boost the self esteem of all my students, but especially my struggling students. These lessons give them a time to shine! There are no right or wrong answers. They can just be themselves and with a little guidance, they flourish! 


Evidence for Portfolios
I keep all our directed drawings from the year and create a "photo album" for the students to take home at the end of the year. They can see their growth from August to June. It also is a wonderful keepsake for their families. Sometimes we connect a writing assignment to our drawings, which is also a wonderful way to document all they have learned.

I hope you will give directed drawings a try in your classroom. Use the picture above to model the steps and get started today. Your students will love it!

Differentiating Instruction With Task Cards

Task Cards....oh how I love thee! Task cards are an amazing teaching resource I could not live without it! They are engaging, easy to prep, versatile and my kids get excited when we use them. They are one of my go to resources for all subjects!


I LOVE using task cards in my classroom!! They provide such a versatile way to review skills quickly and in a meaningful way. My students love to grab a set of cards and a recording sheet. Sometimes they work with a partner. Sometimes they work independently. Sometimes we work on them as a whole class. But no matter how they are being used, the kids are engaged and learning!


To help differentiate my instruction, I make sure whatever skill I am working on with my students is asked in different ways and at different levels. Some of the cards contain multiple choice responses. Sometimes they need to fill in the blank. And sometimes the answers are open-ended and they need to write a sentence or explain their reasoning.

Just this week, we reviewed cause and effect skills. I had the kids work in groups of four to discuss and reason their answers with one another. Each group received 3 task cards. After 4 minutes, they rotated to the next table together and completed 3 different cards. Once they had rotated through the tables, we met as a whole group and discussed the answers they came up. It was great to see them working together, justifying their answers, and explaining their reasoning.

OTHER WAYS TO USE TASK CARDS:

1. Fast Finisher Activity- Place cards in a bin with recording sheet or hang them on hooks so students can easily access them.

2. Small Group Work- I like using task cards as review instruction in small groups. I give each student 2 or 3 cards so quickly assess their understanding and reteach where necessary.

3. Whole Group Instruction- I project the cards (see below) for everyone to see. They record their answers on their sheet and then we review the answers together. Usually I will have students come up and model/explain their thinking for other students to see.

4. As a Center- Similiar to a fast finisher activity, I place the set of task cards with recording sheet in a bin. Students easily access the materials and complete the activity.

5. Read the Room or I Spy Activity- During this activity, I post the cards of a specific skill around the room. Then I give each student a recording sheet. They students don't have to do the cards in order. They just need to make sure they get to each one. I like this activity because students can work on it at their own pace. Sometimes I leave the cards up for a day or two before we review the answers together. This takes pressure off those students that may need more time to complete them.


HOW TO MANAGE YOUR TASK CARDS:

I keep all my task card sets on metal rings. I hang the skills we are working on, along with a few review concepts on hooks in my classroom. This makes it easy for the kids to independently grab what they need to work on. When they are finished, the find the corresponding answer sheet, I keep in our task card binder and correct their work. When we work on a set as a whole group, I project the cards for everyone to see. Then, they record their answers on the provided student recording sheet. We always discuss our answers and correct as we go.


Are you ready to start using task cards in your classroom? To help get you started, I have this set of task cards as a FREEBIE for you to try out. If you love using them in your classroom, as much as I do, head over to my TpT store and check out all my MATH and ELA task card sets to help differentiate your students' learning.


{DON'T FORGET IT. PIN IT!}


MLK Activities and a FREEBIE

It's hard to believe we are already half way through January! I just went back to work this week. We had an incredible three week vacation and now reality has set in. My teacher planning wheels are in full gear. 

We jumped in with both feet and started learning about Martin Luther King Jr. I was able to get some of the activities done that I had planned, but our learning is going to continue for several weeks. Tolerance and acceptance of others is not a one month lesson! 

I started off the week by reading this book about Martin Luther King Jr.'s life. It was just the right amount of informational text for my kiddos. I hooked them, but didn't lose their interest! Win-win!


Then I used the vocabulary cards from my Martin Luther King Jr. packet to help with comprehension and understanding. We followed up with a vocabulary review page that we used in our ELA interactive notebooks.

Martin Luther King vocabulary cards

As we were reading different books about MLK's life, we created this classroom timeline. It is a great visual reference for my students. I have seen several of them getting up and checking the timeline while they are working on follow up activities. A teacher's dream! 

Martin Luther King timeline

We also started working on a paper bag interactive books about MLK's life. Oh, how the kids L-O-V-E-D this activity. It was engaging and meaningful because they were in the process of learning about MLK's life. I prepped and stapled the paper bags ahead of time for the kids. They colored and cut each of the parts. Then, as a class, we assembled the books, so there was little room for error.

MLK paper bag book

MLK paper bag book

All these activities can be found in my Martin Luther King Jr. packet. 


And now it's time for a FREEBIE. Here is a True or False Flap Book to kick start or add to your Martin Luther King Jr. activities. It can be completed whole group, in partners, or independently depending on your group of students. 


Thanks for stopping by. I hope everyone enjoys their long weekend! 

New Year Resolution FREEBIE

It is hard to believe that 2015 is coming to an end and 2016 is just around the corner. Most of us are just fully  emerged in winter break and can barely think about anything except making sure our alarm clocks are turned off! 

However, some of us are planners! Me.. Me...Me!!! In preparation for the New Year, I created and prepped these resolution crafts for my kiddos to complete the first week we are back from break.


All the templates are included to create a boy or girl New Year's Resolution booklet.


All you have to do is copy the templates on white paper. Next, choose if you want your students to write a personal resolution or a school resolution. I am going to make an anchor chart  and have a discussion with my class, so they have ideas about what resolutions are and what they mean. Finally, cut and staple the pages together to make your booklets.


You can grab this activity with all the templates for your class too! Just click on the picture below and grab your FREE copy! 
Happy New Year everyone!

Holiday Classroom Traditions


I am excited to be joining some of my blogging friends to share everything HOLIDAYS with you!
December is in full swing and I have been packing in the holiday projects like nobody's business this week. First up....


 1. Reindeer Portraits

I LOVE making these directed drawings with my students each year! Every single one of them is a success! They add a TON of festive cheer to our room and the kids are proud of themselves.
I HATE, let me repeat....I HATE paint, painting or anything that has to do with paint and kids in my classroom. HOWEVER, for some unknown reason, I love when the kids paint these reindeer. I pull them up in groups of 5. They have their own little station with watercolors. water, and their picture. We go over the painting rules together and for the most part the kids ROCK it!
You can find the step by step directions for this project at Artventurous: Reindeer Portraits.

  2. Snowman Ornaments
 I am always looking for memorable gifts my students can give to their families for the holidays. These adorable salt and flour snowman ornament were loved by all my families. I had my mom come in and help the students form the noses and round faces. She took the snowman home and baked them to dry them quicker. The next day, the kids painted them. We let them dry and we added ribbon.

3. Christmas Tree Math
This math craft is always a favorite of mine and a big hit with the kids. It is from Amy Lemon's blog. I created different ornaments to go with the math skill of regrouping, so my kids could get extra practice. But really you could use the idea in so many different way to work in your classroom.

What are some of your favorite traditions? I would love to hear your ideas!